Perfect Gluten-Free Cinnamon Rolls Recipe
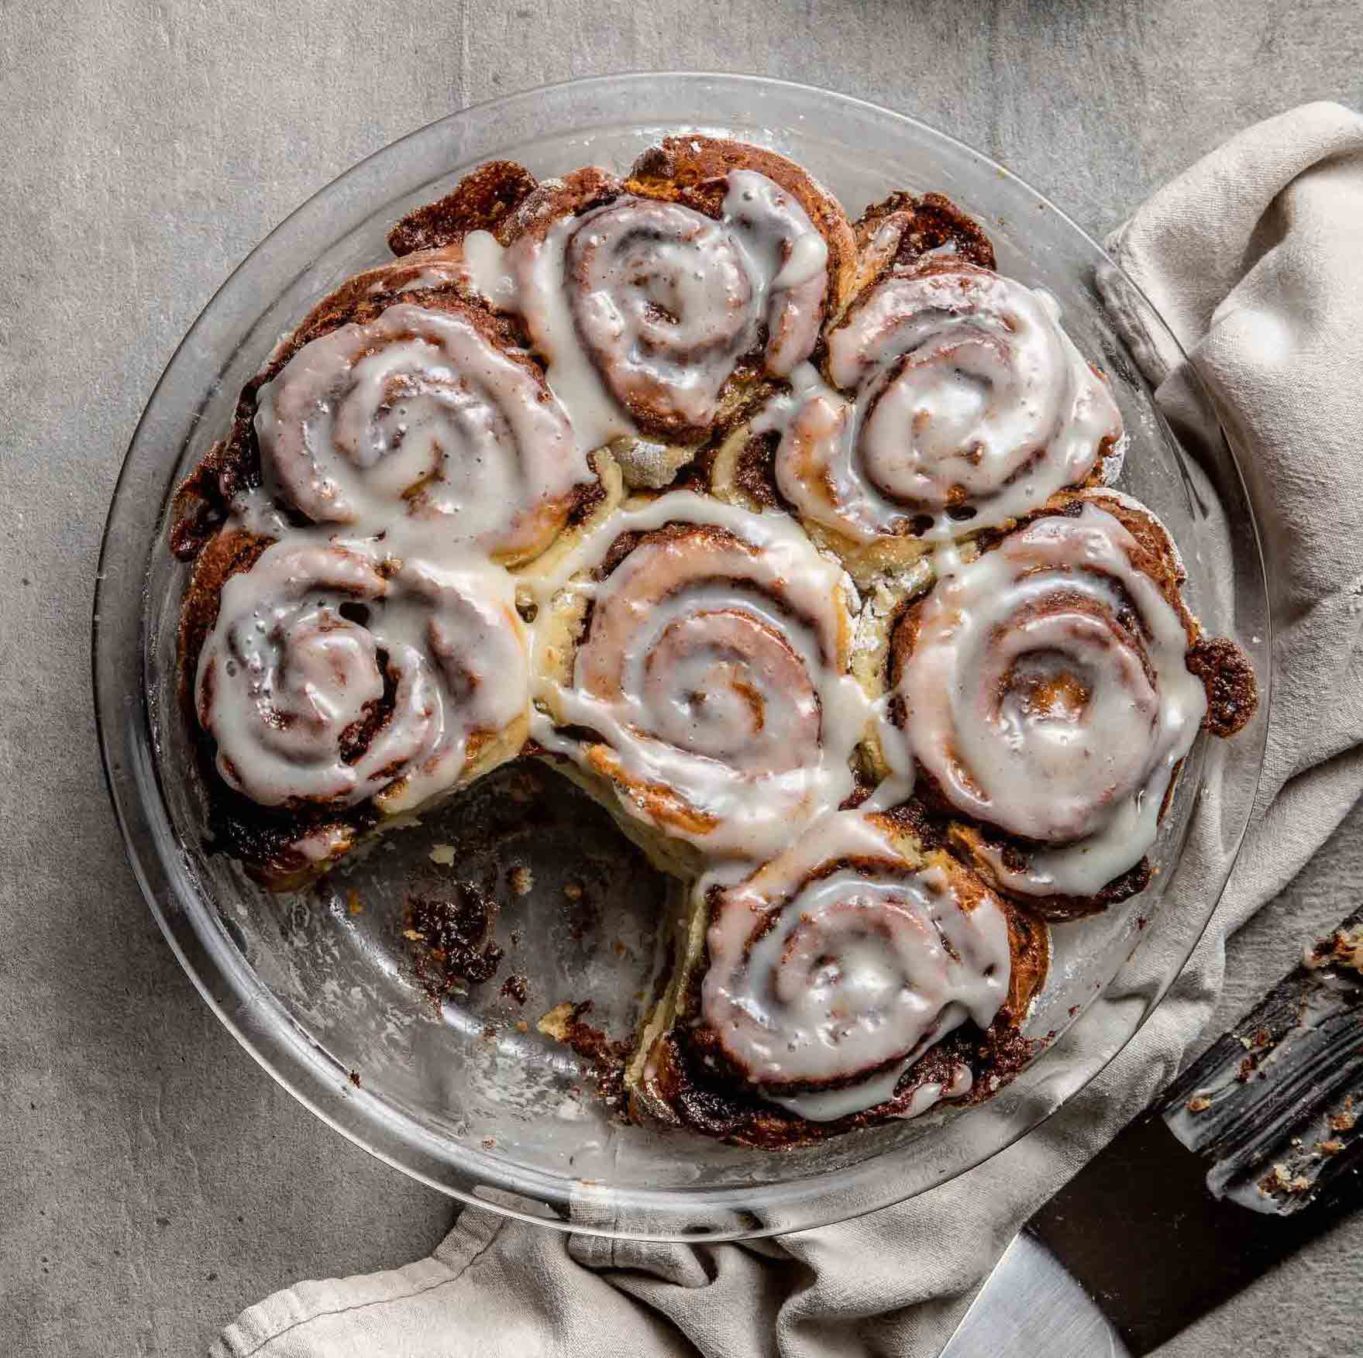
If you’ve been craving authentic pull-apart cinnamon rolls the way they’re supposed to be, drop everything and put on your apron. This gluten free cinnamon rolls recipe, inspired Recreating Happiness blogger Rachel Jackson, lets all the chewy-gooey goodness unfurl.

Perfect Gluten-Free Cinnamon Rolls Recipe
The dough is extremely soft and sticky, so be sure to follow the directions for the tidiest results, and make sure the butter for the filling is very soft. There are no redos in this rollup, so don’t try to unroll and roll again. If you don’t love the look of your rolls, grease and flour a cupcake tin and bake the rolls individually for single-serving deliciousness that looks and tastes great no matter what! Note: this recipe calls for dental floss for easy slicing; if you don’t have any, use a clean, sharp knife to cut the dough, wiping clean between cuts. Cinnamon rolls are best the day they’re baked but are also delicious kept covered at room temperature and enjoyed the next day. You can also freeze uncooked or cooked rolls wrapped in plastic wrap. Make Ahead: You can refrigerate unbaked cinnamon rolls, sliced and placed in their pie plate, covered in plastic wrap, the day before you want to cook them. To bake, bring them to room temperature for 30 minutes, then bake, following the recipe directions.
Ingredients
FOR THE DOUGH:
- 1 packet 7 grams active yeast
- 1/4 cup granulated sugar
- 2/3 cup whole milk
- 1/2 cup (83 grams) potato starch
- 1/2 cup (80 grams) brown rice flour
- 1/4 cup (34 grams) tapioca starch, plus at least 1/3 cup more for pie plate and work surface
- 1/4 cup (40 grams) sweet white rice flour
- 2-1/2 teaspoons baking powder
- 1/2 teaspoon baking soda
- 1-1/2 teaspoons xanthan gum
- 1/2 teaspoon kosher salt
- 1 egg
- 1/4 cup plus 1 tablespoon olive oil plus more for greasing
- 1 teaspoon pure vanilla extract
FOR THE FILLING:
- 4 tablespoons (1/2 stick) unsalted butter extremely soft
- 1/2 cup firmly packed brown sugar
- 2 tablespoons ground cinnamon
FOR THE ICING:
- 3 tablespoons cream cheese softened
- 3/4 cup powdered sugar sifted
- 2 tablespoons whole milk
- 1/2 teaspoon pure vanilla extract
Instructions
-
Make the dough: In the bowl of a stand mixer fitted with the paddle attachment, combine the yeast and sugar.
In the microwave, warm the milk to approximately 115°F. Whisk the milk into the yeast mixture and set aside in a warm spot to proof for 10 minutes.
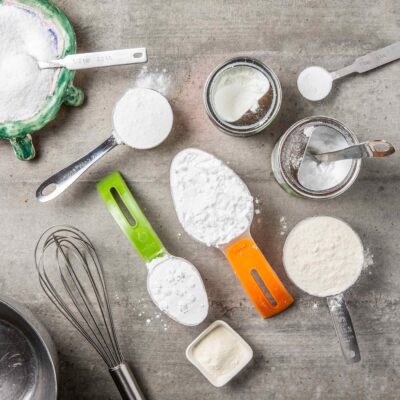
Meanwhile, in small bowl, mix together the potato starch, brown rice flour, tapioca starch, sweet white rice flour, baking powder, baking soda, xanthan gum, and salt.
To the bowl with the yeast, add the egg, oil, and vanilla, then beat for 10 seconds on low. Continuing on low, gradually add the flour mixture. Turn the mixer to high and beat for 2 minutes more. Using a spatula, transfer the soft, sticky dough to a piece of plastic wrap, shape it into a disk, wrap, and refrigerate for at least 1 hour.

-
Heat the oven to 350°F. Grease and lightly flour a pie plate with olive oil and tapioca starch. Lay a 15-inch piece of plastic wrap on a clean surface. Dust the plastic wrap with 1/4 cup tapioca flour, making sure to generously cover the plastic wrapped surface.
-
Make the filling: In a small bowl, mix together the filling ingredients. Set aside in a warm place.
-
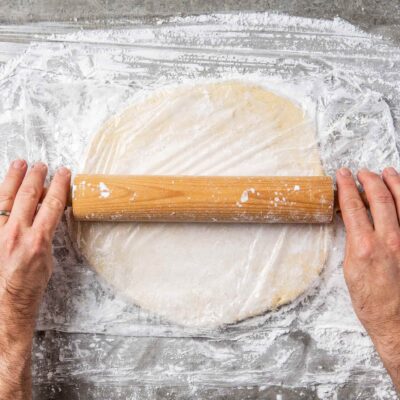
Working quickly, unwrap the chilled dough onto the flour-dusted plastic wrap. The dough will still be soft and sticky, but it should peel away from the plastic wrap easily. Generously dust the top of the dough with more tapioca flour. Cover the dough with another piece of plastic wrap, then, using a rolling pin, gently roll out the dough between the two pieces of plastic wrap to form a 13 by 10-inch rectangle.

-
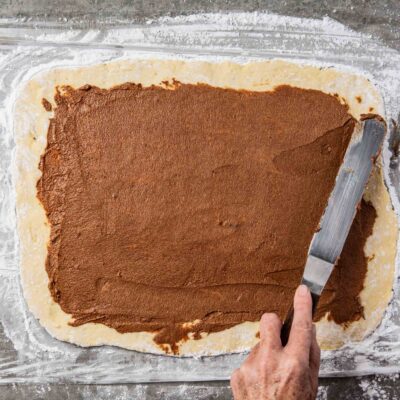
Spread the filling: Place dollops of the filling over the dough. Using a knife, spatula, or the back of a spoon, very gently spread the filling mixture over the dough until it is 1 inch from the edges of the dough. If it’s difficult to spread, don’t worry; just spread the dollops as best you can.

-
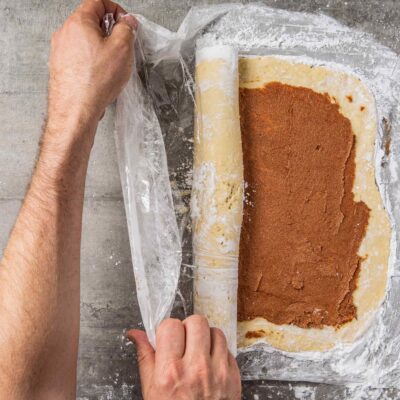
Roll up the dough: Starting on a shorter side of the rectangle, gently, slowly roll the dough into a tight log, using the plastic wrap to help lift and roll. If the dough begins to tear, dust your fingers with tapioca flour, then gently detach the dough from the plastic wrap and keep going. With a clean knife, slice off the ends of the roll to create clean edges.

-
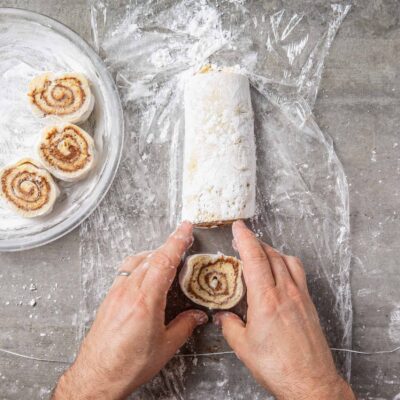
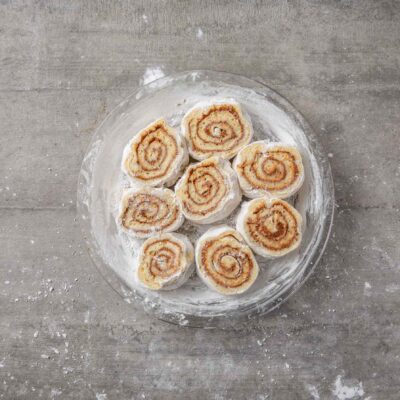
Use clean dental floss to cut the dough into 8 rolls by sliding the floss under the dough to where you want to cut, then lifting up both sides of the floss to gently cut through the dough. Transfer each roll, with one of its cut sides up, to the prepared pie plate. Cover the rolls with plastic wrap and a towel, place the pie plate in a warm spot, and let rest for 15 minutes.

-
Remove the plastic wrap and towel and bake the rolls until their tops are golden brown, 22 to 25 minutes.

-
Make the icing: In a bowl, mix the cream cheese and powdered sugar until smooth. Whisk in the milk and vanilla. Drizzle the icing onto the cinnamon rolls after they have cooled for at least 10 minutes. Serve warm or at room temperature.
Photography Erin Ng


21 Comments on “Perfect Gluten-Free Cinnamon Rolls Recipe”
I’ve tried this once and the dough was basically cake batter even after leaving in the fridge for several hours
The dough was pretty tricky to work with, but the final product was delicious!
Greetings. This dough sould never be the consistency of cake batter. I wonder if too much liquid ingredients were mistakenly added? If you try it again, please let me know.
Can they be made dairy free using water or rice milk and Earth Balance Vegan sticks?
Hi! We haven’t tried it. I’m confident the texture will change some, but it’s worth a try. Let me know if you try it before I do!
This recipe was a huge hit on Christmas morning! I prepped everything to the point of letting it rest for 15 minutes prior to baking and then stuck the prepared rolls in the fridge overnight. The results were outstanding. I couldn’t find potato starch at our local WF, so I subbed extra tapioca of the same amount, and it turned out well. For the filling, my butter took forever to soften, so I melted the butter and then let it sit in the fridge for about 15 minutes prior to mixing with the sugar and cinnamon, and that worked well. We’ll definitely be making these again for special occasions!
I’m so glad! Thank you for letting us know.
I’ll also made the dough and assembled on Christmas Eve and refrigerated it. Took out the dish on Christmas morning to rise on the stove while the oven preheated and we opened our gifts, then popped the dish in the oven. Everyone loved them! Thank you for this outstanding recipe!
Oooh! Thanks for the details and I’m so so glad you enjoyed them!
Could these be frozen?
Yes!
Hi! When is it best to freeze the dough? Before or after you let it rise? Any suggestions are appreciated.
Freeze it after it rises for sure!
Hello! Are the eggs in this recipe to raise the dough or is it to keep things together? My daughter has a severe egg allergy and the only egg replacer we have is not to be used for rising dough. Thank you!
Can this dough be made in the bread machine? Do you have a simpler version that just uses gf flour like King Arthur measure for measure?
Hello! To get the right texture, the recipe is best made with the ingredients listed, unfortunately. We haven’t tried it in a bread machine, but I don’t see why not. It’s just a very sticky dough!
Can we use melted butter instead of olive oil? My son can’t have olive oil. Thanks!
These are fabulous. I’m a pretty experienced GF baker and I have to admit that the first time I made these it was a little but difficult, but SO worth it. My family absolutely loved them and the second time around making them was much easier. I definitely recommend this recipe.
This “dough” was so sticky I couldn’t get it to roll and had to toss it because I couldn’t even bake it. Used the correct amount of liquid to dry ingredients after noting another commenter’s troubles and left it in the fridge for an hour and a half. Still too sticky to spread or even put filling on. What a waste
I’m so sorry it didn’t work for you, Kelley. Yes, the dough is tricky to work with. If you try it and find yourself in that situation again, I recommend you grease a cupcake tin, spoon in the dough with a wet spoon (no sticking!), with layers of the cinnamon filling and see what you get!
This recipe worked very well for me on the first try. The cinnamon rolls were really good, and popular! I plan to make them again.