Sweet Potato Pie Gluten-Free Recipe
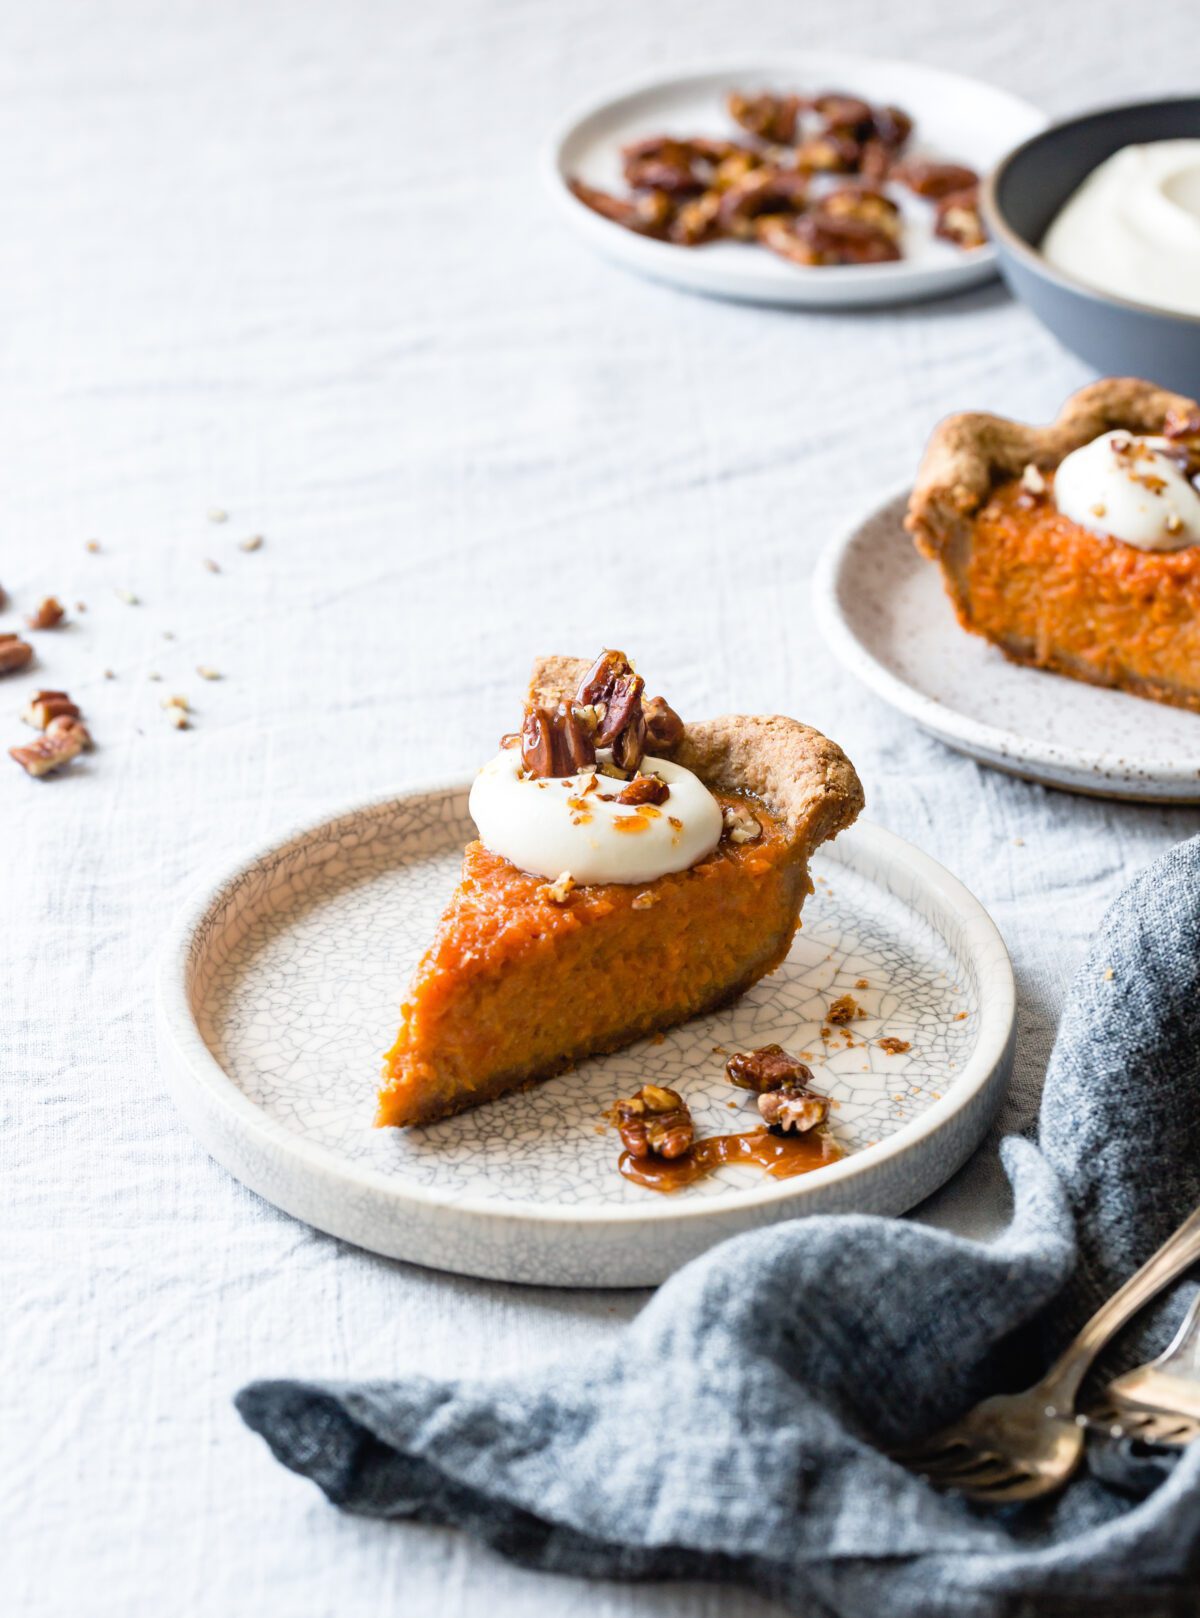
The earthy flavor of homemade teff piecrust complements the vibrant sweet potato custard filling in this luscious gluten free sweet potato pie dessert by GFF contributor Alanna Taylor-Tobin. Add a smothering of whipped cream and salty candied pecans for crunch and you’ve got one heck of a dessert for Thanksgiving or anytime. Don’t feel like cooking everything from scratch? You can also use a store-bought crust or your preferred piecrust recipe for this tasty, colorful dessert; whatever you choose, par-bake it before starting this recipe.
Find more gluten-free recipes in Alanna’s book Alternative Baker: Reinventing Dessert with Gluten-Free Grains and Flours, available here!
Sweet Potato Pie Gluten-Free Recipe
The pie is best the day it’s baked, when the crust is crisp; but you can cover and refrigerate leftovers for 3 days.
Servings 8
Ingredients
- 2 pounds Garnet or Jewel sweet potatoes 3 to 4 medium or 2 cups cooked, mashed sweet potatoes
- 3 tablespoons (3/8 stick) unsalted butter
- 3 eggs
- 1/2 cup (120 grams) firmly packed light brown sugar
- 1/4 cup (50 grams) granulated sugar
- 1/2 teaspoon freshly grated nutmeg
- 1/4 teaspoon kosher salt
- 2 tablespoons gluten-free bourbon or dark or spiced rum (optional)
- 1 teaspoon pure vanilla extract
- 2/3 cup whole milk
- 1 recipe Flaky Teff-Flour Piecrust (below) or your favorite gluten-free piecrust, parbaked and warm
- Lightly sweetened whipped cream for serving
- 1 recipe Candied Pecans optional (below)
Instructions
-
Preheat the oven to 400ºF. Line a small, rimmed baking sheet with parchment paper. Prick the sweet potatoes several times with a fork. Place on the prepared baking sheet and roast until collapsing and tender when squeezed with a pair of tongs, 50 to 80 minutes. Let cool enough to handle, then peel and scoop out two cups of flesh and place in a large bowl. Add the butter to the warm sweet potato flesh and mash smooth with a fork (some fibers and lumps are okay). Set aside.
-
Reduce the oven temperature to 350ºF. In a medium bowl, whisk together the eggs, sugars, nutmeg, and salt until smooth. Whisk in the bourbon, vanilla, and milk, then whisk the egg mixture into the sweet potato mixture until combined.
-
Pour the filling into the warm, parbaked piecrust. Bake, on the baking sheet, until the filling is puffed and beginning to crack around the edges, and the pie wobbles when shaken, 40 to 50 minutes. Let cool to room temperature, about 2 hours, then slice and serve with dollops of whipped cream and a sprinkling of the Candied Pecans.
Flaky Teff-Flour Piecrust Gluten-Free Recipe
MAKES 1 (9-INCH) PIECRUST Teff is the dominant flavor in this whole-grain, gum-free piecrust, which gets extra flake from rolling out and folding the dough over itself several times, in the manner of puff pastry. If you don’t have a food processor, make the dough by hand by cutting the butter into the flour mixture to form pea-sized chunks, then adding the ice water mixture 1 tablespoon at a time, stirring to incorporate with a flexible spatula. Along with Sweet Potato Pie (above), try this crust with other pies, like apple, pumpkin, banana cream, and pecan, as well as for quiches, galettes, and hand pies.
Ingredients
- 1/2 cup (80 grams) sweet rice flour
- 1/4 cup plus 2 tablespoons (40 grams) gluten-free oat flour, plus more for dusting
- 1/4 cup (35 grams) teff flour
- 1/4 cup (30 grams) cornstarch
- 2 tablespoons (15 grams) tapioca flour
- 2-1/2 tablespoons (12 grams) finely ground chia seed (preferably white)
- 1 tablespoon (12 grams) granulated sugar
- 1/2 teaspoon fine sea salt
- 8 tablespoons (1 stick) cold, unsalted butter, sliced ¼-inch thick
- 1/4 cup ice water plus more as needed
- 1/4 cup cold well-shaken buttermilk (or additional ice water)
Instructions
-
In a food processor, combine the sweet rice, oat, and teff flours with the cornstarch, tapioca flour, ground chia seed, sugar, and salt. Place the sliced butter over the top, put the lid on the processor, and open the pouring chute, but don’t pulse yet. In a small pitcher, combine the ice water and buttermilk. Begin pulsing the processor, simultaneously pouring in the liquid in a slow, steady stream. Remove the lid and give the dough a squeeze; it should feel moist but not sticky, and hold together, with lots of pea-size butter pieces. If it feels dry, sprinkle in a teaspoon or two more ice water and pulse quickly to combine until the dough is moistened enough to hold together when squeezed. Gather the dough into a ball, place on a sheet of plastic wrap or beeswax wrap, flatten into a disk, wrap tightly, and chill until firm, 30 to 60 minutes or up to 1 day.
-
If the dough is very cold, let soften at room temperature until malleable, 5 to 15 minutes. Dust your work surface lightly with oat flour and use a rolling pin to roll the dough out into a rough rectangle about ¼-inch thick, lifting and turning the dough, dusting underneath to keep it from sticking, flipping it over, and sweeping away excess flour with a pastry brush. (Alternatively, roll the dough between two pieces of parchment paper dusted with oat flour to prevent sticking.) When the dough is rolled out, fold it into thirds, as though folding a letter, then fold it in thirds again the other way. Gently press to flatten slightly, re-wrap, and chill for 30 to 60 minutes more. Repeat this process once, chilling until firm again, 30 to 60 minutes.
-
Remove the dough from the fridge, unwrap, and place on a lightly floured surface. Roll out the dough into a 12-inch circle, dusting the dough lightly with oat flour as needed, rotating and flipping it to prevent sticking. Ease the dough into a 9-inch glass pie plate, rolling it onto the rolling pin for easier transport, if necessary, then unrolling it. Fit the dough into the corners, and trim it to a 1-inch overhang. Save scraps to patch any tears in the dough post-parbaking. Fold the overhang of the crust under itself and flute the crust by pressing it between the thumb of one hand and the index finger and thumb of the other hand. Prick the bottom of the crust all over with the tines of a fork. Chill the crust until firm, at least 30 minutes.
-
Position a rack in the lower third of the oven and preheat to 400ºF. If you have a baking stone, put it on the rack. Place the chilled crust on a rimmed baking sheet. Line the crust with a piece of parchment paper and fill to the top with pie weights or dry beans, pressing the weights gently into the sides and corners of the crust. Bake until the crust holds its shape when you lift off the edge of the parchment, 15 to 30 minutes, depending on your pan (shorter for metal and longer for glass). Carefully remove the weights and parchment and bake the crust until the bottom is dry and lightly golden, 8 to 12 minutes more. Use the saved dough scraps to patch any holes, cracks, or tears, baking for a few more minutes post-patching.
Candied Pecans Gluten-Free Recipe
MAKES 1 CUP These toasty-sweet nuts are spectacular for snacking or adding to salads. Cover and store leftovers at room temperature for 1 week.
Ingredients
- 1 cup pecan halves
- 1/4 cup (50 grams) granulated sugar
- 1 teaspoon gluten-free light corn syrup golden syrup, or honey
- 1 teaspoon salted or unsalted butter
- 1/2 teaspoon flaky salt (such as Maldon)
Instructions
-
Preheat the oven to 350°F. Spread the pecans on a baking sheet and toast until just beginning to smell nutty and to get a little darker, 10 to 15 minutes.
-
Line a baking sheet with parchment paper; set aside.
-
In a small, heavy saucepan, pour in enough water to barely cover the bottom of the pan. Add the sugar to the center of the pot, ensuring any crystals that get on the sides of the pan are returned to the water. Add the corn syrup, cover, then bring the mixture to a boil over medium-high heat and cook until the sugar has dissolved, 2 to 3 minutes. Uncover and, without stirring, boil the syrup until it reaches an amber color. (If the mixture begins to crystallize, add a little more water and begin the caramelization process again.) Remove from the heat and immediately swirl in the butter and salt, then add the nuts and stir quickly to coat with a heatproof silicone spatula.
-
Transfer the nuts to the prepared baking sheet and quickly separate the pieces using the spatula. Let the nuts cool, then break or chop coarsely.
Photography Alanna Taylor-Tobin
