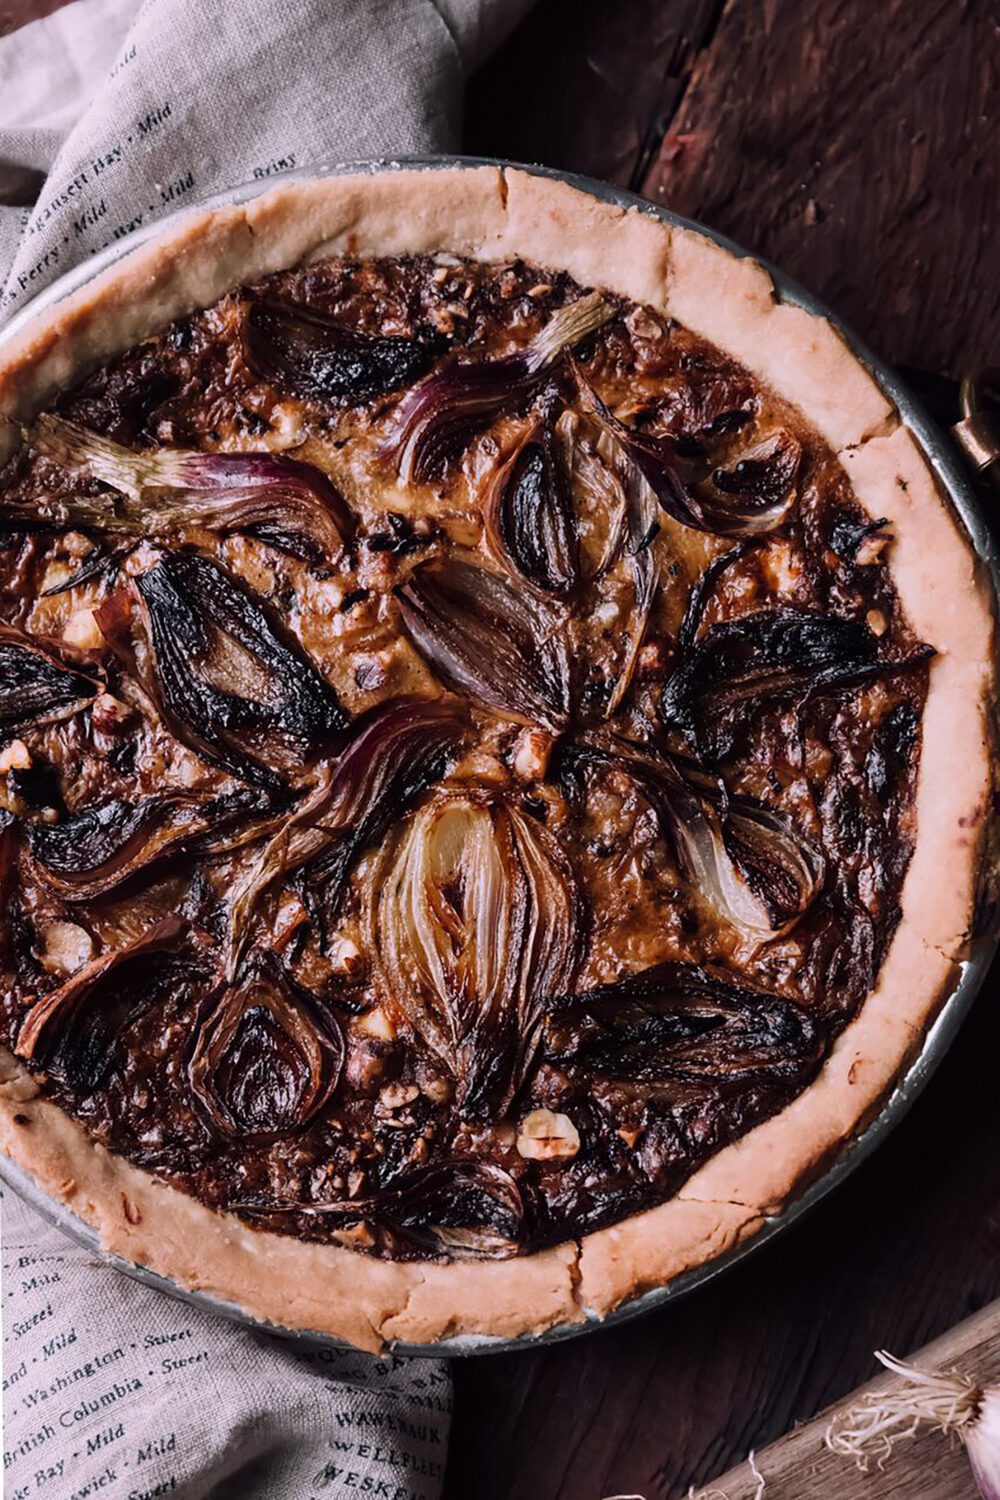
Caramelized Onion and Blue Cheese Tart Gluten-Free Recipe

Rich and creamy with hints of sweet, salt, and tang, this gooey-good caramelized onion gluten free tart is a fantastic appetizer, side dish, or luncheon main course. It also features a superstar crust you’ll want to use for other dishes, such as quiches and pies. Want a more crust-free, fondue-like experience? Bake the filling directly in a small, well-greased baking dish and serve it with your favorite gluten-free toasted baguette.
Caramelized Onion and Blue Cheese Tart Gluten-Free Recipe
Servings 1 (10-inch) Tart
Ingredients
FOR THE CRUST:
- 1/2 cup (1 stick) unsalted butter, cold and cut into small cubes, plus more for greasing
- 2/3 cup (95 grams) brown rice flour
- 1/2 cup (75 grams) your favorite 1-to-1 gluten-free flour blend, plus more for dusting
- 1/4 cup (35 grams) arrowroot flour
- 1/4 teaspoon sea or kosher salt
- 1 egg yolk
- 3 to 7 tablespoons ice water
FOR THE FILLING:
- 3 tablespoons olive oil, plus 2 tablespoons more (for optional shallots)
- 6 cups thinly sliced yellow onions (from about 2 large onions)
- Kosher salt and freshly ground pepper
- 3 to 4 medium shallots sliced into wedges through their stems (optional)
- 2-1/2 tablespoons chopped hazelnuts
- 1 cup heavy cream
- ½ cup sour cream
- 2 egg yolks
- 3 tablespoons arrowroot flour
- 2/3 cup crumbled Gorgonzola cheese
Instructions
-
Grease a 10-inch non-ceramic pie pan with butter. Prepare the crust: In a food processor, combine the three flours and the sea salt; pulse to mix. Add the 1/2 cup butter and pulse until the butter is the size of peas and the dough starts to clump together.
-
In a small bowl, whisk together the egg yolk and 3 tablespoons of the ice water. Slowly add the mixture to the dough while pulsing, until a slightly sticky ball forms. Do not over-pulse; stop as soon as the dough begins to clump, and there are nearly no flour bits left. Add a little more ice water only if necessary.
-
On a lightly floured surface, work the dough gently into a ball, flatten it into a 1-inch disk, wrap it in plastic, and refrigerate for 30 minutes.
-
Dust a rolling pin and clean surface with flour. Roll the dough into a disk large enough to cover the pie pan and about 1/8-inch thick. Cover the pie pan with the dough, gently pressing it to fit and pressing any cracks back together; trim and discard any overhanging dough. If the dough is hard to move, roll it onto the rolling pin, then unroll it onto the pan. Freeze the crust (this helps dough keep its shape during baking).
-
Make the filling: In a large, heavy pot, heat the 3 tablespoons olive oil over medium-high heat. Add the onions, 1/2 teaspoon salt, and pepper to taste, and cook, stirring occasionally, until the onions begin to stick to the bottom of the pot and form browned but not burned bits, 25 to 30 minutes. (Turn down the heat to medium if the onions start to burn.)
-
Preheat the oven to 400°F. Add 1/4 cup water to the onions and continue to cook, stirring, until onions are golden brown, 8 to 10 minutes more. Set aside to cool, discarding any extra oil in the pot.
-
Optional step for extra-beautiful presentation: Slice the shallots into wedges and brown lightly in a pan with the remaining 2 tablespoons olive oil over medium heat for 2 to 4 minutes, flipping halfway through cooking. Set aside.
-
In small saucepan over medium heat, toast the nuts until fragrant, 5 to 7 minutes, stirring occasionally. Set aside.
-
In a small bowl, whisk together the heavy cream, sour cream, and egg yolks. Add the arrowroot, 1/2 teaspoon salt, and 2 pinches pepper and whisk until smooth. Stir in the cooled caramelized onions, then fold in the Gorgonzola cheese. Pour the mixture into the prepared crust. Smooth the top with a spoon, decoratively arrange the shallots, cut sides up, then sprinkle the nuts on top.
-
Bake for 15 minutes, then lower the oven temperature to 375°F without opening the oven door. Continue to cook until the filling is just set and only slightly wobbly, 15 to 20 minutes. Let cool for at least 15 minutes before cutting. Enjoy warm.
Photography Christiann Koepke

